
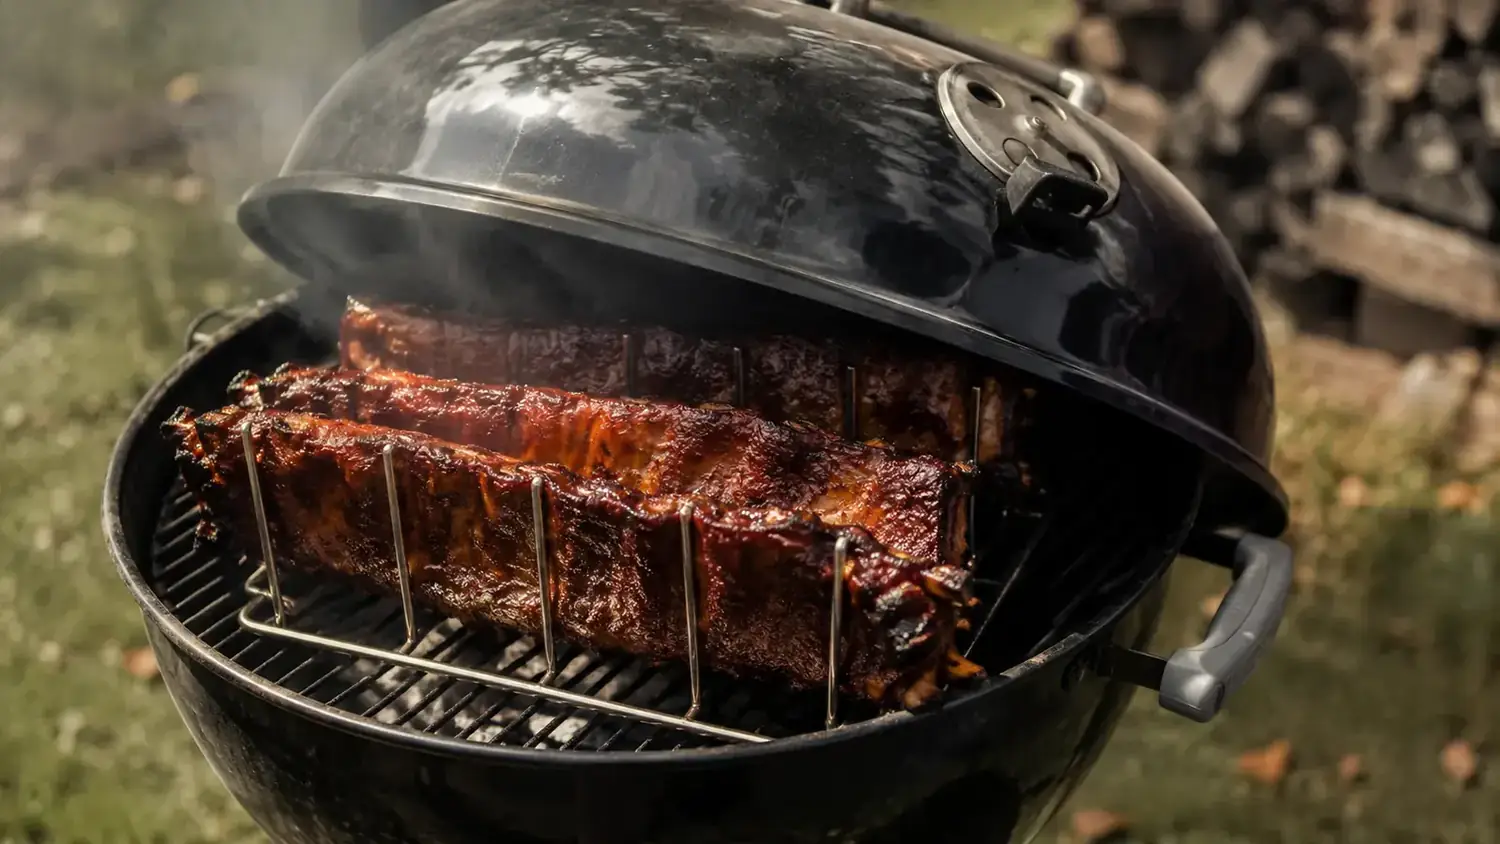
I want to be upfront with you: I own the ACMETOP Extra Long Stainless Steel Rib Rack and I use it. It has not rusted on me, it holds multiple racks, and I recommend it to people who ask. But I also get emails from readers who bought one after reading an enthusiastic five-star review and ran into problems nobody warned them about. The lid that would not close on their kettle grill. The tips of their ribs that dried out before the rest of the meat caught up. The St. Louis spares that were too wide to actually fit three to a rack. Those are real problems and they are worth knowing about before you spend the money.
This review covers the practical limitations of the ACMETOP rib rack, specifically. Not the made-up fears, not stuff that applies to every rib rack on the market, but the specific quirks of this particular tool that will matter to you depending on what grill you have, what cut of ribs you prefer, and how you set up for indirect cooking. If you want the full season-long experience and overall verdict, I wrote that up separately in my rib rack long-term review. This piece is for the person who wants to know what nobody is bothering to mention.
The Quick Verdict
A genuinely useful tool for baby backs and small rib cuts, but the lid clearance issue on covered kettle grills, the real capacity limit with St. Louis spares, and the sharp slot edges add friction that the product page glosses over entirely.
Amazon Check Today's Price →Know the limits going in and this rack earns its spot on the shelf
The ACMETOP rib rack is rated 4.6 stars by over 3,300 buyers on Amazon. It is a well-built tool with real limitations. Read the section on lid clearance before you order if you cook on a kettle grill.
Amazon Check Today's Price on Amazon →How I Tested and What I Was Looking For
I approached this round of testing specifically to break things. I loaded the rack with the widest St. Louis spare rib slabs I could find at the butcher counter. I ran it on my Weber 22-inch kettle with the dome lid closed, which is the setup most backyard cooks assume they can use for indirect low-and-slow cooking. I skipped the rotation trick I normally use on my gas grill to see what the hot-spot situation would look like without that intervention. And I paid close attention to what happened at the very bottom of the ribs where the meat sits closest to the grate.
I also ran my fingertips carefully along every edge of the rack before the first cook, something I should have done the first time I pulled it out of the box and did not. And I deliberately left a full rack unwashed for 48 hours after a cook with a lot of dripping fat to see what the cleanup situation actually looks like when you are not on top of it. I want to be the person who made these small mistakes so you do not have to.
The rack I tested is the standard ACMETOP model, ASIN B07SFDNL9C, purchased new. I tested it on a 22-inch Weber charcoal kettle and a three-burner gas grill. Baby back ribs, St. Louis spare ribs, and one cook of beef back ribs for fit comparison. Three separate cook days, conditions noted below.
The Sharp Edge Issue Is More Serious Than Most Reviews Let On
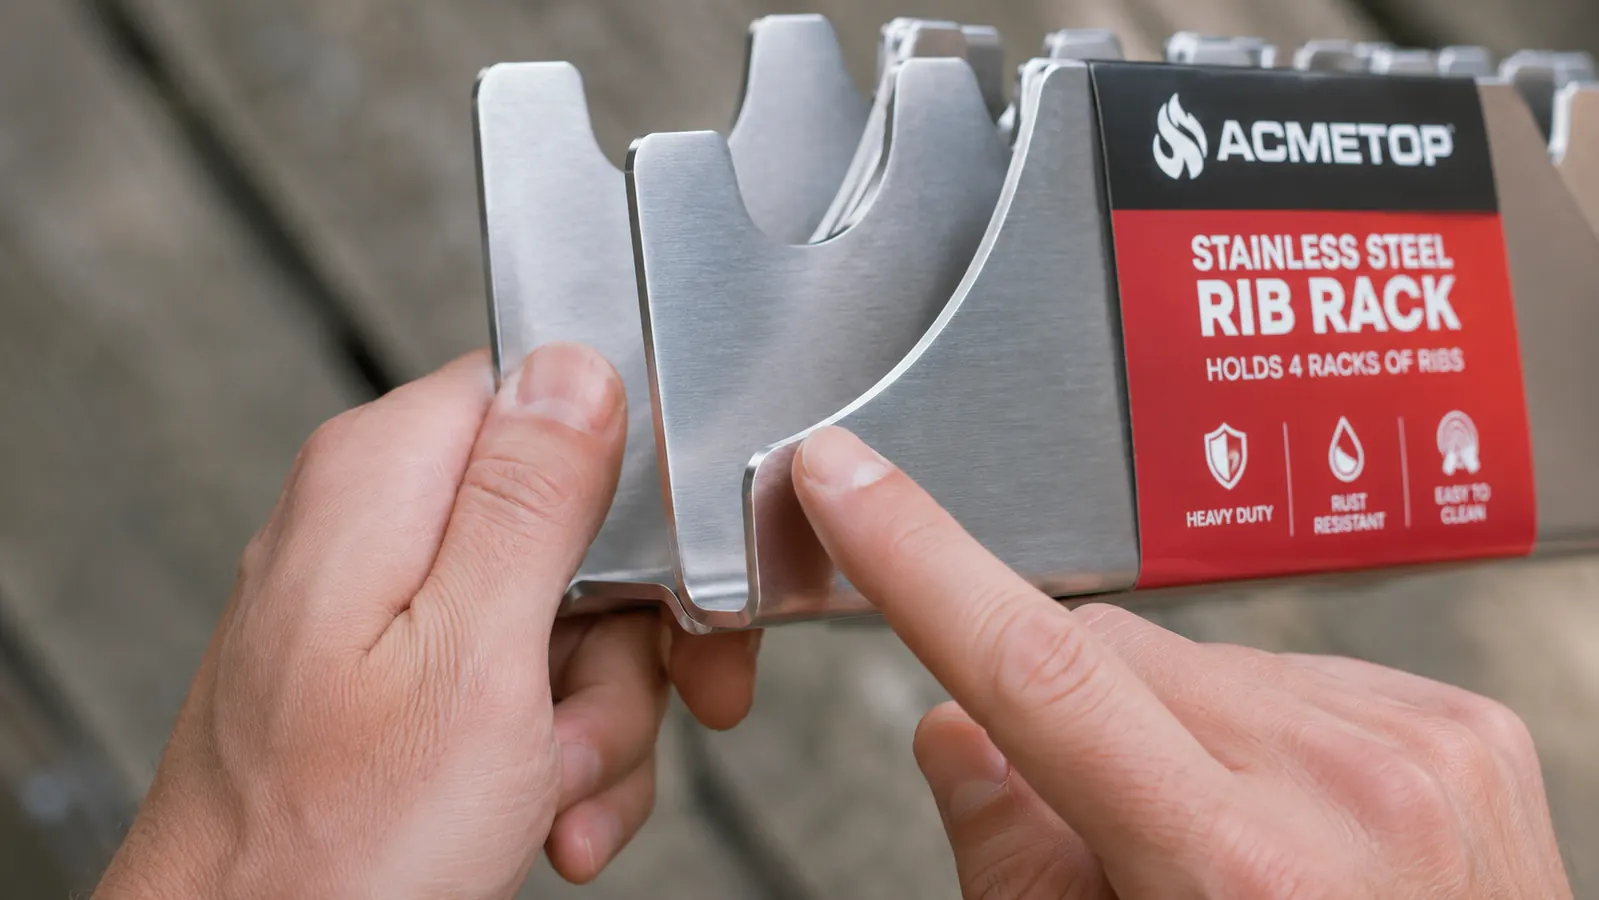
The slots on this rack are stamped and cut from sheet steel. That means every slot edge has a raw cut metal edge that has not been ground smooth or rolled over. The edges are not sharp like a knife blade, but they are sharp enough that if you drag a wet finger along one while repositioning a rib slab mid-cook, you will know it. I found this out the hard way on a Fourth of July cook when I was rushing and not paying attention. Nothing serious, but it bled enough to ruin my mood for a few minutes.
The issue is most present at the top of each slot, where the rib slab is easiest to grab. When you pull a finished rib rack upward to remove it from the slot, your fingers have to squeeze down between the slab and the slot wall, which puts your fingertips right against that cut metal edge. If your hands are slick with glaze or fat, the control disappears fast. My solution is to always use heat-resistant gloves for this specific step, not bare hands. That fixes the problem but it is a design consideration the manufacturer has never addressed.
The fix costs nothing. Keep your BBQ gloves nearby and treat loading and unloading the rack the same way you would treat handling a sharp knife: deliberate movements, dry hands, no rushing. But I want you to know about this before your first cook rather than learning it by surprise the way I did.
The Lid Clearance Problem on Kettle Grills
This is the big one that almost nobody mentions in the top reviews. The ACMETOP rib rack is designed to be extra long, meaning the ribs stand noticeably taller off the grate than on a standard-height rack. That extra height is genuinely useful for airflow, but it creates a real problem if you plan to cook with the lid closed on a standard 22-inch kettle grill.
Full racks of baby backs standing upright in this rack clear the top of the dome on a Weber 22-inch kettle by about a half inch. On a slightly shorter grate, or if your ribs are meaty and tall, they touch the lid. When the lid cannot sit flush, you lose your indirect heat setup entirely. The heat and smoke escape from the gap, your temperature drops, and instead of a controlled low-and-slow environment you get a half-open grill that runs hot and dry. I did one whole cook this way before I figured out what was happening. The ribs came out tighter than I wanted, especially around the bone ends.
The workaround is indirect heat without a lid, which works on gas grills because you can use the burner configuration to create a cool zone. On a charcoal kettle, indirect heat without a closed lid is much harder to maintain because you need the lid to trap both heat and smoke. If you cook on a kettle and you like low-and-slow indirect smoke, this rack will force you to think differently about your setup. Either run the ribs uncovered for longer, use a grill extender ring to add dome height, or switch to baby backs instead of full-height spare ribs. None of those is a disaster, but none of them is what the product listing implies.
The Capacity Claim Is Only True for Baby Backs
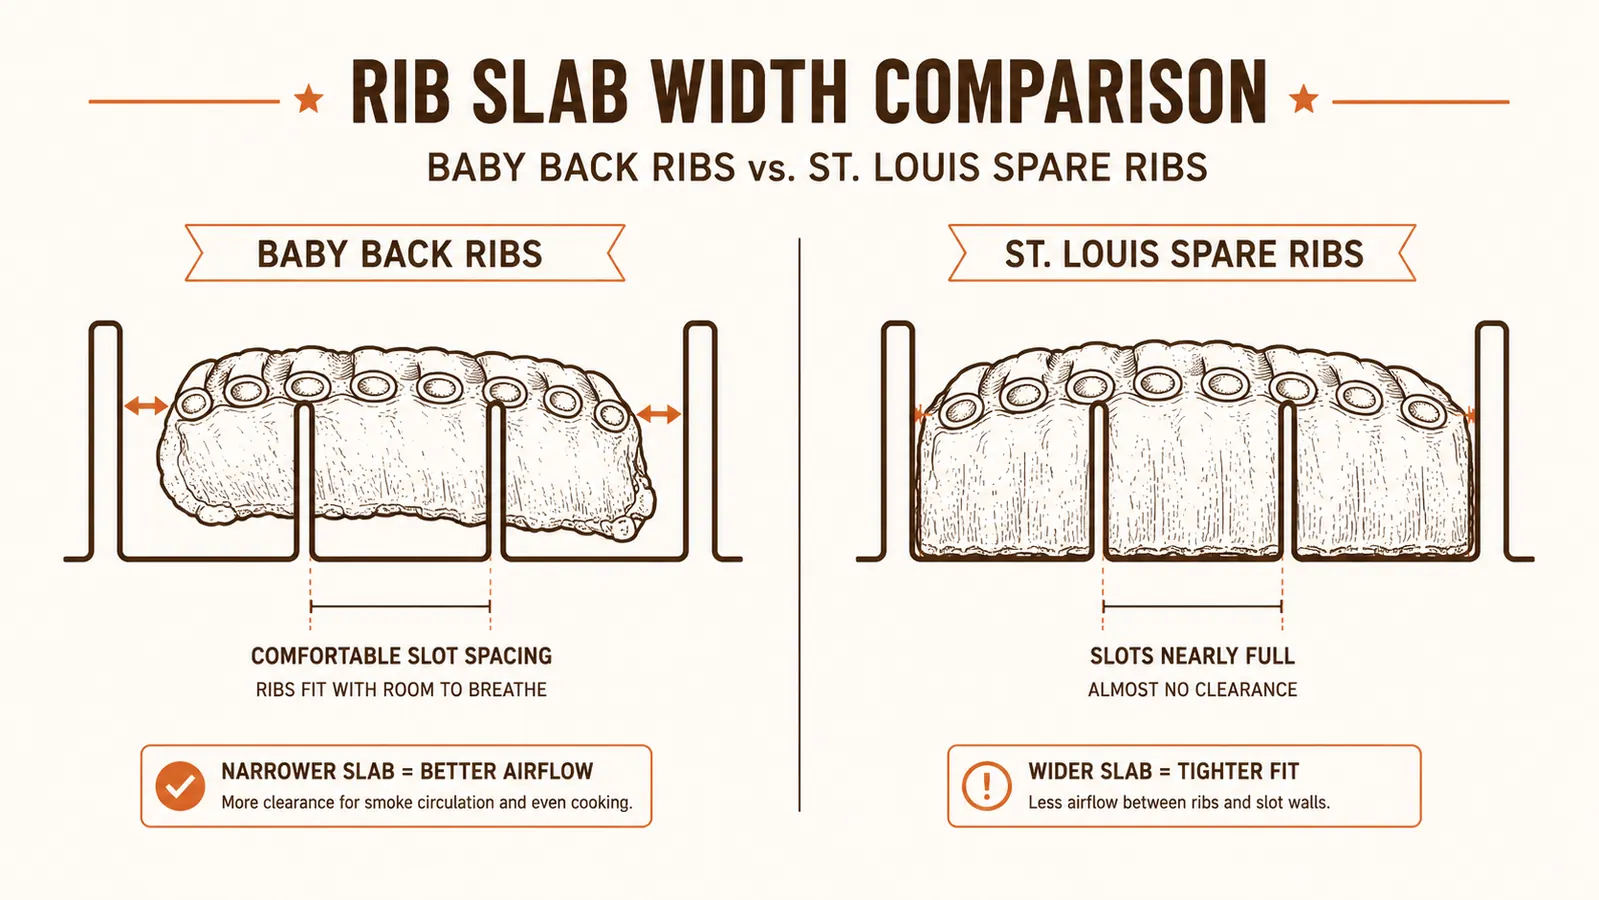
The product listing says this rack holds up to three full racks of ribs. That is accurate for baby backs, which are narrower and fit the slot width comfortably with a little breathing room between slabs. It is misleading for St. Louis spare ribs, which are cut from the belly side and run about two to three inches wider than a baby back slab.
When I loaded three full racks of St. Louis spares, the outermost slabs bent slightly outward at the top because the rack was not wide enough to let them stand perfectly vertical. The middle slab was wedged between the two outer ones. The contact between slabs creates a problem: wherever two rib surfaces are touching, you get steaming instead of smoking. The contact zones stay pale and soft while the exposed surfaces develop bark. You end up with inconsistent texture across a single rack of ribs, which is the kind of thing that frustrates you when you are serving a crowd and trying to plate nicely.
Realistically, two St. Louis spare rib slabs in this rack works well. Three is too tight. If St. Louis spares are your go-to cut, build your shopping list around two racks of spares plus one rack of baby backs, or just accept that this rack is a two-slab tool for the wider cut. It is still a space-saving improvement over laying ribs flat, but the three-rack claim on the package does not apply to the widest common rib cut. For a side-by-side look at whether the rack or the foil wrap method handles these cuts better, take a look at my rib rack vs foil wrap comparison, where I cover this exact texture issue in more detail.
The rack holds three full baby backs, no argument. Three St. Louis spares? You will be fighting the slabs the whole cook and they will touch where they should not.
Tip Drying: What Happens to the Bottom of Your Ribs
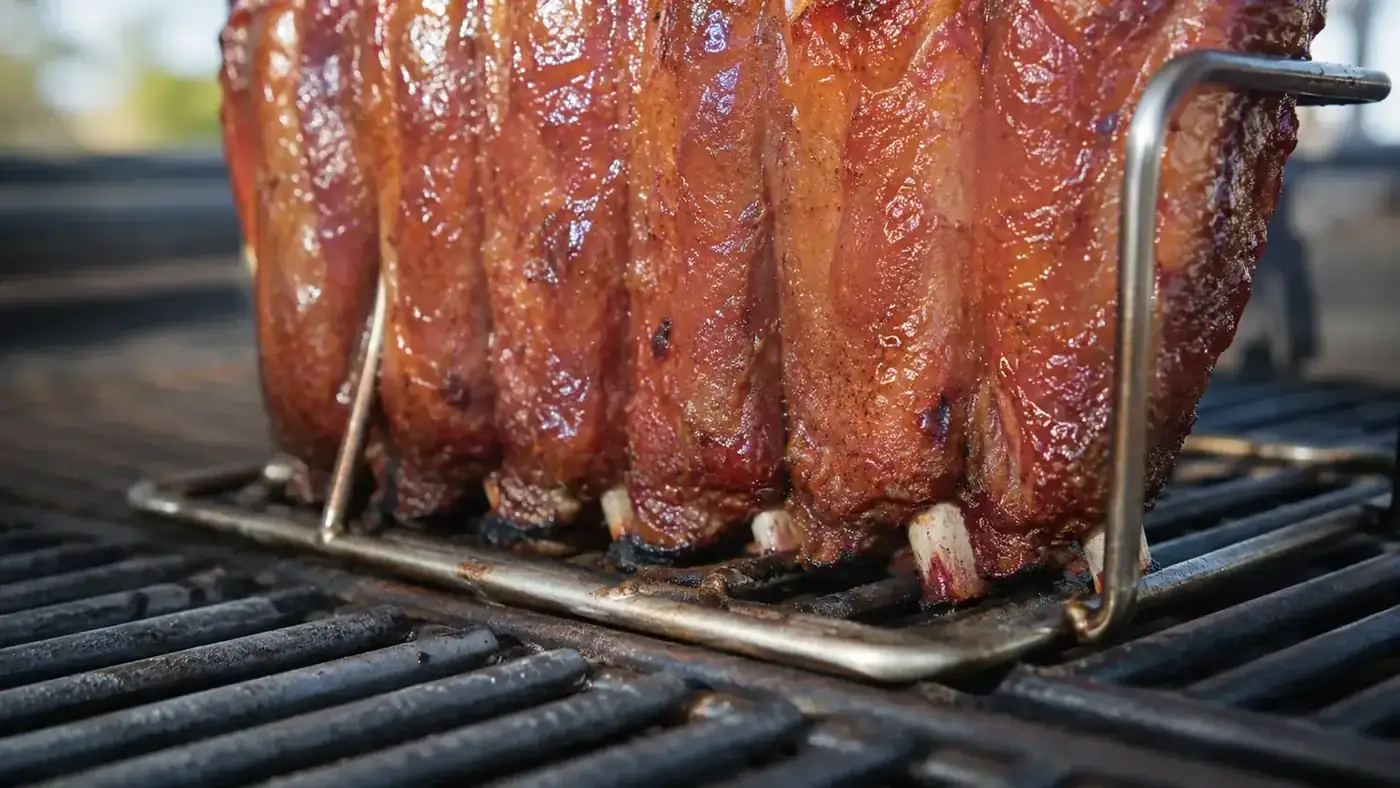
When ribs stand upright in a rack, the tips of the rib bones sit closest to the grill grates and to whatever heat source is beneath them. On a gas grill with even heat distribution, this shows up as the bottom inch or two of the ribs cooking faster and running slightly drier than the rest. On a charcoal grill with any hot spot below the rack position, the tip drying can be more pronounced.
I first noticed this on a cook in late July when the outside temperature was in the mid-nineties and my grill was running slightly hotter than usual because the ambient heat was high. The last half inch of the rib tips came off with that tight, overcooked texture that is fine for gnawing but not what you want to put on a plate for company. The rest of the rib was perfect. Just the bottoms were overdone.
The fix is straightforward once you know to look for it. If you are on gas, rotate the rack 180 degrees halfway through your cook so the tips that started on the hotter end finish on the cooler end. If you are on charcoal with a two-zone setup, position the rack on the indirect side and keep the bottom of the rack away from the edge closest to the coals. Spritzing the bottom portion of the ribs with apple juice or water every hour also helps. These are all minor adjustments, but none of them are mentioned in any of the marketing materials or in most user reviews, which tend to focus on the finished product rather than the mid-cook management.
Cleanup Between the Slots: The Part That Takes Patience
A rib cook produces a lot of rendered fat and sticky bark drippings. On a flat grate, the drippings fall through to the drip pan and the grate itself is relatively easy to scrub. On a rib rack, every drip runs down the surface of the rack and collects in the base, around the slot weld points, and in the narrow gaps between the vertical supports. When that fat cools down, it sets up into a sticky layer that is genuinely annoying to scrub out of the tight spots.
If you clean the rack while it is still warm, the fat is still liquid and it rinses off easily with hot water and dish soap and a stiff bottle brush. If you let it cool to room temperature and then try to clean it the next day, you are working against solidified fat in tight gaps and it takes noticeably longer. I tested this deliberately by leaving the rack unwashed for 48 hours after a cook with a lot of dripping. The cleanup took close to 20 minutes instead of the usual 8 to 10. It came fully clean in the end, and the stainless steel released the buildup without any abrasive scrubber, but the time difference is real.
The practical advice is simple: run the rack under hot water right after the cook is done, before anything sets up. Do not let it sit on the grate while you eat and then deal with it an hour later. It is a five-minute rinse when it is warm versus a 20-minute project once it cools. That is user behavior, not a flaw in the product, but it is worth knowing before you settle into a routine with this thing.
What I Liked
- 304 stainless holds up to heavy use without rust, even after being left in the rain overnight
- Baby back ribs fit three to a rack with genuine spacing between slabs
- Heavy enough base that the rack does not tip or shift mid-cook on either gas or charcoal grates
- Cleans up completely in under 10 minutes if you tackle it while still warm
- Competitive price for a full stainless build at this weight
Where It Falls Short
- Slot edges are raw stamped metal with noticeable sharpness that requires gloves during loading and unloading
- Full-height racks of ribs touch or nearly touch the dome on a standard 22-inch kettle grill, compromising the indirect heat setup
- Three St. Louis spare rib slabs is too tight, slabs press together and steam at contact points instead of smoking
- Rib tips sitting closest to the grate dry out faster and need active management with rotation or spritzing
- Cleanup in the tight slot gaps requires prompt attention while warm or the work multiplies
Who This Is For
The ACMETOP rack is the right buy if you cook baby back ribs on a gas grill or on a charcoal grill where you have a little extra dome height, a barrel smoker or a kamado style, for example. It works well for the backyard cook who wants more grate space and better smoke exposure on smaller cuts, and who is willing to do a little mid-cook management to handle the hot spot issue. If you already know to rotate things mid-cook and you clean your equipment promptly, you will not run into most of the problems I described above.
Who Should Skip It
Skip this rack if you cook St. Louis spare ribs as your primary cut and you want to fit three full slabs at once. The math does not work out in your favor. Skip it if your primary setup is a standard 22-inch kettle grill and you rely on a closed lid for indirect heat control. The lid clearance issue is real enough that it will change your cook approach significantly. And skip it if you have young helpers in the kitchen who are not aware of the sharp slot edges, because getting them familiar with proper handling is an extra step that a better-designed rack would not require. None of these are reasons to dismiss the product entirely, but they are reasons to look at whether this particular tool fits the specific setup you have in your backyard right now.
Good rack, specific conditions, know them before you click buy
The ACMETOP stainless rib rack earns its 4.6-star average for the cooks it works well for. If baby backs on a gas grill or a barrel smoker describe your setup, order with confidence. If thick St. Louis spares on a closed kettle is your world, read the lid clearance section one more time first.
Amazon Check Today's Price on Amazon →